Tuesday, 10 May 2016

The Ultimate 'never fails' Pizza dough


Homemade Pizza is a weekly treat in our house. It might seem like a hassle to make your dough from scratch, but as long as you have an hour to leave it to rise, the actual dough making aspect is the quick bit. The more you make it the easier it gets. Now I really enjoy the process of kneading the dough and look forward to Pizza night in our house.

I am a big fan of recipes that my children can help out with and also meals we can eat together as a family. Pizza is ideal for this. I often make pizza dough when my 4 year old has a friend coming over for dinner as children love to choose their own toppings. My eldest son is very fussy and I lose track with which topping he likes/doesn't like. So I find homemade pizza works well as he is in control of the flavours!

When you make your own dough, the results are always great, this particular dough has a lovely flavour. Plus you can stretch out super thin if you like your base to be crispy. Or have a more doughy base if you prefer. If you want a inexpensive way of feeding a family this is the ultimate, I often use 'Pizza night' as a way of using up left overs from the fridge. Ham, salami, mushrooms, bacon, rocket etc... Or be more indulgent and buy some delicious Parma Ham or Prosciutto from the deli! The below recipe will make 4 large pizzas or 4 medium pizzas and dough left to make garlic pizza bread or dough balls (which my kids LOVE).

If you have never made pizza before, or have tried other recipes but not got on well with it, please try this. You will never look back! As all my recipes, it is fool proof and minimum effort, maximum output. Enjoy and please tweet me pictures or let me know how you get on! 

Recipe:

500g Strong white bread flour
1 level dessert spoon salt
1 level dessert spoon caster sugar
1 sachet (7.5g) fast action yeast
325ml luke warm water
2 table spoons extra virgin olive oil (if you haven't got extra virgin, olive oil works just fine as I found out last week!)
Toppings of your choice.
Tomato sauce: There are lots of options here. You can use passata straight from a jar, or tomato puree spread on the base if strapped for time.
 
Alternatively:

The ultimate pizza base sauce: Finely chop an onion and garlic. Fry in a pan with a little olive oil. When the onions are nicely caramelised, add a 500 can/jar of passatta. Bring to the boil and then reduce down to a simmer. Season well with salt and pepper and add fresh basil. 


Method:

Wash your hands and remove any rings as this will get messy!
Pre heat your oven to 220c. The hotter the better! 
Put your pizza tray/oven tray(s) in the oven, as the pizza needs to go onto a hot tray for a nice crispy base.

Add the water, yeast, oil and sugar to a measuring jug and give a good stir. Leave for a couple of mins to settle whilst you do the next bit.


Weigh out the flour, sieve into a large roomy mixing bowl and add the salt.

Use a fork to make a well in the middle of the bowl of flour for the water/yeast mixture. 

Slowly pour in the water mixture into the middle of the 'well' stirring with a fork as you go. Once all the liquid is incorporated, use your hands to knead together for about 3 mins until you have a nice smooth dough in a ball. 


Cover the bowl with a tea towel to leave to rise for an hour. It will be ready when the dough has doubled in size.


Once risen, wash your hands and lightly flour them. Now, knock the air out of the dough with your hands until you have a nice smooth ball again. If you are using the dough straight away, separate the dough into portions. If you have made it in advance, you can put the dough into a sandwich bag and put in the fridge until you need it? Incidentally it also freezes well.

Use your hands to stretch into pizza bases, or a rolling pin if you prefer? 

I tend to put the bases onto a piece of foil, as you can then put the toppings on and transfer them to the hot baking trays when they are ready to cook. 

Add your tomato sauce and then toppings of your choice. I recommend putting the cheese on last. 

Bake in the oven for 6-10 mins as ovens vary. Try and put in the middle of the oven, so you can watch the pizza cooking through the oven door. 

Enjoy!


Friday, 22 April 2016

Fruit Scones


I think fruit scones are seriously under rated.
They are always quicker to make than I remember, they smell delicious as they are cooking and then eaten warm from the oven, they really are just the perfect accompaniment to a cup of tea.

For me, this is one of my super quick and simple 'go to recipes' when I have friends popping in and nothing to offer in the house.

You don't need any eggs, just flour, a small amount of butter and sugar and some milk. They take about 10-15 mins to make and 12 mins to bake. They are quick and inexpensive to make, which beats a trip to the shops to buy some biscuits.

You can serve with butter and jam, or go all out with clotted cream.
My children absolutely love them and they are great as an after school snack. They are quite filling and have far less sugar than most other sweet treats.

Use this recipe as a guide but you can use wholemeal flour if you prefer. Or even make them plain without the fruit.

Recipe:

Makes 6 (double the recipe if you need to)

225g self raising flour
60g butter
1 tbsp caster sugar
150ml full fat milk
150g sultanas * raisins work well too or try chopped cherries.

Method:

Pre heat your oven to 220C or 200C fan oven. Place some non stick paper on a baking sheet.

Weigh out the flour and sieve into a bowl. Add the butter and gently rub the butter into your fingertips into the mixture resembles breadcrumbs.


Add the sugar and dried fruit and stir until incorporated evenly, then slowly add the milk whilst stirring to form a dough.


Turn the dough out onto a floured board. The less you handle the dough, the lighter the scone (I was once told as a child). So once the dough is on the board flatten gently with your finger tips. No need to use a rolling pin. I like the uneven rustic look anyway!


Cut out rounds and place on your baking sheet.


Brush the tops of the scones with a little milk.

Bake for approx 12 mins. They should be nicely risen and golden brown on top.


Put the kettle on and enjoy!


Saturday, 26 March 2016

A recipe for Easter. Mini Egg Brownies


Wishing all my lovely blog readers a Happy Easter! 

These Mini Egg brownies really are a minimum effort, maximum output Easter treat.

Easter to me has always been about the food. A delicious leg of Lamb on Easter Sunday. Easter Eggs galore and any Easter themed dessert of some sort. If you are not in a chocolate coma by Easter Monday, you haven't really celebrated in my opinion.

I also believe it is essential to have 'Mini Egg' themed treats at home. Either chocolate nests, cupcakes or brownies just like these. These Brownies have MiniEggs both inside and on top. Plus a layer of melted chocolate on top! Deliciously rich and a real chocolate explosion! 


Ingredients:

250g soft unsalted butter
250g good quality dark chocolate (off the shelf chocolate not cooking chocolate)
4 large eggs
2 tsp vanilla extract
300g caster sugar
150g plain flour
2 bags of Mini Eggs (90g per bag) 1 bag for decoration and 1 bag to go inside the brownies.
PLEASE NOTE: PUT ONE BAG OF MINI EGGS IN THE FREEZER. THIS ALLOWS THEM TO KEEP THEIR COLOUR WHEN BAKED IN THE OVEN.

Makes approx 20 large brownies. Or a minimum of 30 little ones. 

Method:

Preheat your oven to 180c fan. Line your brownie tin, greaseproof paper is best. 
(I use a tin measuring 13 x 9 inches. So if your tin is smaller increase baking time slightly as your brownies will be deeper)
Melt the butter and chocolate together in a large saucepan on a very low heat. 


Whilst the butter/choc is melting find a large measuring jug or mixing bowl and beat the eggs with the sugar and vanilla extract.


When the chocolate mixture has melted, leave to cool slightly to avoid scrambled eggs. 


Then beat in the eggs/sugar. When all combined, mix in the flour and 1 bag of mini eggs (taken from the freezer).
Either put them in whole, or use a rolling pin to bash them into small pieces if you prefer?

Mix to combine smoothly and then scrape mix out of the saucepan into your lined tin.

Bake for approx 16 -18 mins. It doesn't seem very long, but the difference between dry and gooey brownies is minutes. You will know when it is ready as the top will seem paler but the middle still gooey. 

Keep them in the tin to cool as they continue to cook whilst in the tin. 

Once cool, turn the brownies out onto a chopping board ready for decorating.


Melt some chocolate in a bowl above boiling water. Drizzle this chocolate over the brownies and use the remaining bag of mini eggs to decorate however you fancy.

To serve, trim the edges off (devourer secretly).

Then use a very sharp knife to cut into squares.

Enjoy!


Slow cooked Beef, Chilli and Ginger Stew

Seeing as the weather is still positively chilly, I thought I had better continue with the theme of slow cooker recipes.

I am always experimenting with new casserole recipes. There is nothing quite like a wet and warming stew in the winter months and this is a real favourite in my house. It is something I can rustle up quickly with ingredients I tend to have at home anyway. It takes less than 20 mins to prepare. You can then leave in the slow cooker to cook itself for a few hours in the afternoon.

The combination of ginger, chilli and plenty of coriander makes this stew fragrant and spicy. Yet the beef is meltingly tender and delicious. It is perfect served with rice and steamed green veg and it feels slightly more healthy than a more traditional stew served with mash.

I am useless at photography, so the photos don't do this stew justice. Please give it a try. It is foolproof, minimum effort and so tasty.


To serve 2:

300-400g of diced casserole/braising beef steak.
2 medium onions chopped
fresh ginger (tip * I always buy frozen and it has just the flavour in my opinion)
2 cloves of garlic chopped
1 red chilli (use more or less depending on your chilli tolerance!)
Plenty of fresh coriander (again I buy frozen - such a cheat, but it is cost effective and saves waste)
A dash of light soy sauce
1 pint of beef stock
1 tsp chinese 5 spice
I dessert spoon of plain flour
salt and pepper

Method:

Add a good glug of olive oil to your casserole dish and heat.

Place the beef in a shallow bowl. Add the flour, a good sprinkle of salt and pepper and the 5 spice. Ensure the beef is evenly coated in the seasoning. You can do this in a sandwich bag if you prefer.

By now, the oil should be sizzling hot. Slowly add the beef pieces to the dish to brown, turning frequently. You want to cook for only a few minutes until nicely browned. Remove the meat and place in a clean bowl.


Now add your chopped onions, garlic, ginger and chilli to the same casserole dish. Add a little extra oil if needed. Stir until the onions translucent and beginning to caramelise.

Return the beef to the casserole dish, add a dash of light soy sauce. Slowly add the beef stock, letting the liquid thicken slowly. Bring to the boil, then simmer to reduce.

Then season well. Add a good sprinkling of chopped coriander (saving some for later) and add the casserole dish to your preheated oven. Cook on low 140 degrees C. Or transfer to your slow cooker.
This needs a good 4 hours to cook. Stirring occasionally. 

Serve with plenty of chopped coriander. I find rice and plenty of steamed green veg go well with this dish.

Enjoy!


Just to say, as this dish is slow cooked. I am sending it to March's slow cooked challenge. Which is a
blogging event hosted by Lucy from Baking Queen 74. If you haven't checked out her food blog. I highly recommend. Especially if you like slow cooked recipes. You can find a link to her blog here:
http://bakingqueen74.co.uk
She jointly hosts the event with Janice from Farmersgirl Kitchen. Another fab and inspiring blog. A link to her site is here: http://farmersgirl.blogspot.com

Slow-Cooked-Challenge


Wednesday, 16 March 2016

Slow cooked Beef and Parsnip Stew


So many of you have asked me to post slow cooked recipes and I think beef stews are often the best.

Nothing quite beats the flavour of beautifully tender beef, plus I love how versatile the meat is. I have so many variations of a 'Beef Stew' and this is one of my favourites. So I have to share it.

It is a very classic Beef Stew, almost like a Beef Bourguignon, as you fry the onions/shallots with garlic and lardons. However the difference is, I don't add red wine with this recipe. The parsnips add a delicious sweetness and flavour and I don't think you need wine.

You can of course add wine if you like. However, if you don't have any to hand to cook with, or any to spare, this recipe works really well without it.

You can choose to cook this on low in your oven. Or your slow cooker. Both work well.

To serve 2 people (generously)

330g of British Beef diced casserole steak
2 large onions or 4/5 shallots
2 rashers or streaky bacon chopped finely. Or one of those little pots of pancetta already diced
2 cloves of garlic chopped
1 large parsnip chopped - large pieces work well.
1 carrot chopped as you wish
1 pint of beef stock
Fresh Parsley
Salt and Pepper

Method:

Firstly add a glug of olive oil to your casserole dish and heat gently.

Coat your beef with a light dusting of flour (a dessert spoon is fine) and a generous helping of salt and pepper.
* Mary Berry recommends adding the beef, flour and seasoning to a freezer bag and shaking to avoid any mess. Very good idea! I tend to just put it all in a bowl and then let the dishwasher get to work afterwards.

When the oil is hot. Add the beef and cook for a few mins, turning to get each piece nice and browned. Set aside in a bowl.

Add the onions, pancetta and garlic and fry gently until all cooked nicely. By now your casserole dish will have lots of very brown bits from the beef/flour earlier. Do not worry about this. As when you add your stock it will dissolve and add plenty of flavour.

Return the beef to the casserole dish and mix with the onions/pancetta and garlic. Slowly add the stock. Stirring as you go. Scrape all the burnt bits into the liquid as you go. At the end you should have a lovely consistency of stock.

Add the parsnip and carrots and give a final stir.


Add to your slow cooker (on low) or in your pre heated oven on about 100 degrees C.

Cook for at least 4 hours. But up to about 8 is fine! Check it occasionally making sure you give it a nice stir. If you know it is cooked perfectly and the meat is beginning to fall apart. Just turn off and heat up again when it is ready to heat.

When ready to serve. Add some black pepper and salt to taste. Plus a generous sprinkling of fresh parsley.

This is perfect with mash potato, jacket potato, a puff pastry top, rice, or even some lovely warm crusty bread.

Enjoy!


Saturday, 20 February 2016

Cherry Bakewell Cake


This is my 'Cherry Bakewell Cake' recipe, which is effectively a Victoria Sponge Cake crossed with a Bakewell Tart. I love anything with the combination of cherries and almonds. Bakewell Tart is one of my favourite puddings. I know the flavours are not everybody's cup of tea, but if you like them like me, give this a whirl!

Like most of my recipes, this cake doesn't take much effort. The filling is jam and the decoration is a drizzle of icing - which is by no means tricky. I think the most effort, is roasting the almonds. As they are so easy to burn! Set a timer.

But the end result is great. It is a very classic looking cake, it looks straight out of a WI coffee morning and really is delicious.

Recipe:

3 medium free range eggs
6 oz self raising flour
6 oz caster sugar
6 oz softened butter or stork margarine
50g ground almonds
raspberry jam 

To decorate 
glace cherries chopped
flaked almonds approx 40g (roasted - careful not to burn - they need about 3 mins in the oven)
icing sugar mixed with water to drizzle.

Method:

Pre heat your oven to 160c Fan
Line two sandwich tins with greaseproof baking paper

Weigh the butter and sugar into a bowl and cream together with a spoon.
Beat the eggs into a small jug and add slowly to the mix.
Slowly sieve the flour into the mixture, followed by the ground almonds. Mix gently. 
Divide the cake mixture evenly into the two cake tins and bake for approx 22 mins until nicely risen and golden brown.

When cool, sandwich together with a generous helping of raspberry jam. Use the best quality you can find as it really makes a difference. If you are lucky enough to have been given a jar of homemade jam by a kind relative, this is the perfect recipe for it.

Scatter the flaked almonds on a baking sheet and roast in a preheated oven for 3-5 mins until browned. Set aside to cool

Mix approx 5 dessert spoons of icing sugar in a bowl with 1 dessert spoon of water to make a water icing. Adding more icing sugar to thicken up if necessary.

Drizzle generously over the cake and sprinkle with chopped cherries and roasted almonds. 


Banana and Chocolate Chip Loaf Cake


Who doesn't like banana loaf cake?

I make it all the time. Banana loaf requires very little effort, it is delicious warm from the oven and there is no need for decoration. I often think the most simple, basic cakes are the best and even if you have never baked before, you will be able to manage this recipe.

Loaf cakes are great to have at home when you need a pick me up in the afternoon with a cup of tea. It is not a fancy multi layer cake, so you tend to have a small slice - which is hardly going to make you pile on the pounds. Plus, you are often using up an old banana that would have otherwise gone into the bin ;-) Guilt free all round!

As much as I love a good old simple banana loaf, I am a big fan of experimenting with flavour combinations. Chocolate and Banana go so well together,  so adding chocolate chips is a wonderfully simple but delicious modification!

Recipe:

190g self raising flour
120g butter/stork margarine (softened)
160g light brown sugar - caster sugar is fine if you don't have LBS
2 medium free range eggs 
2 overly ripe bananas - the more bruised the better!
100g chocolate chips. 

Method:

Preheat the oven to 160C fan oven
Line your loaf tin with grease proof paper
Weigh out the butter and sugar into a bowl and cream together with a spoon
Beat the eggs into a small jug and SLOWLY add to the creamed butter and sugar, stirring as you go.
Mash the Bananas with a fork and fold into the mix.
Weigh the flour and sieve slowly into the mix. Stir gently.
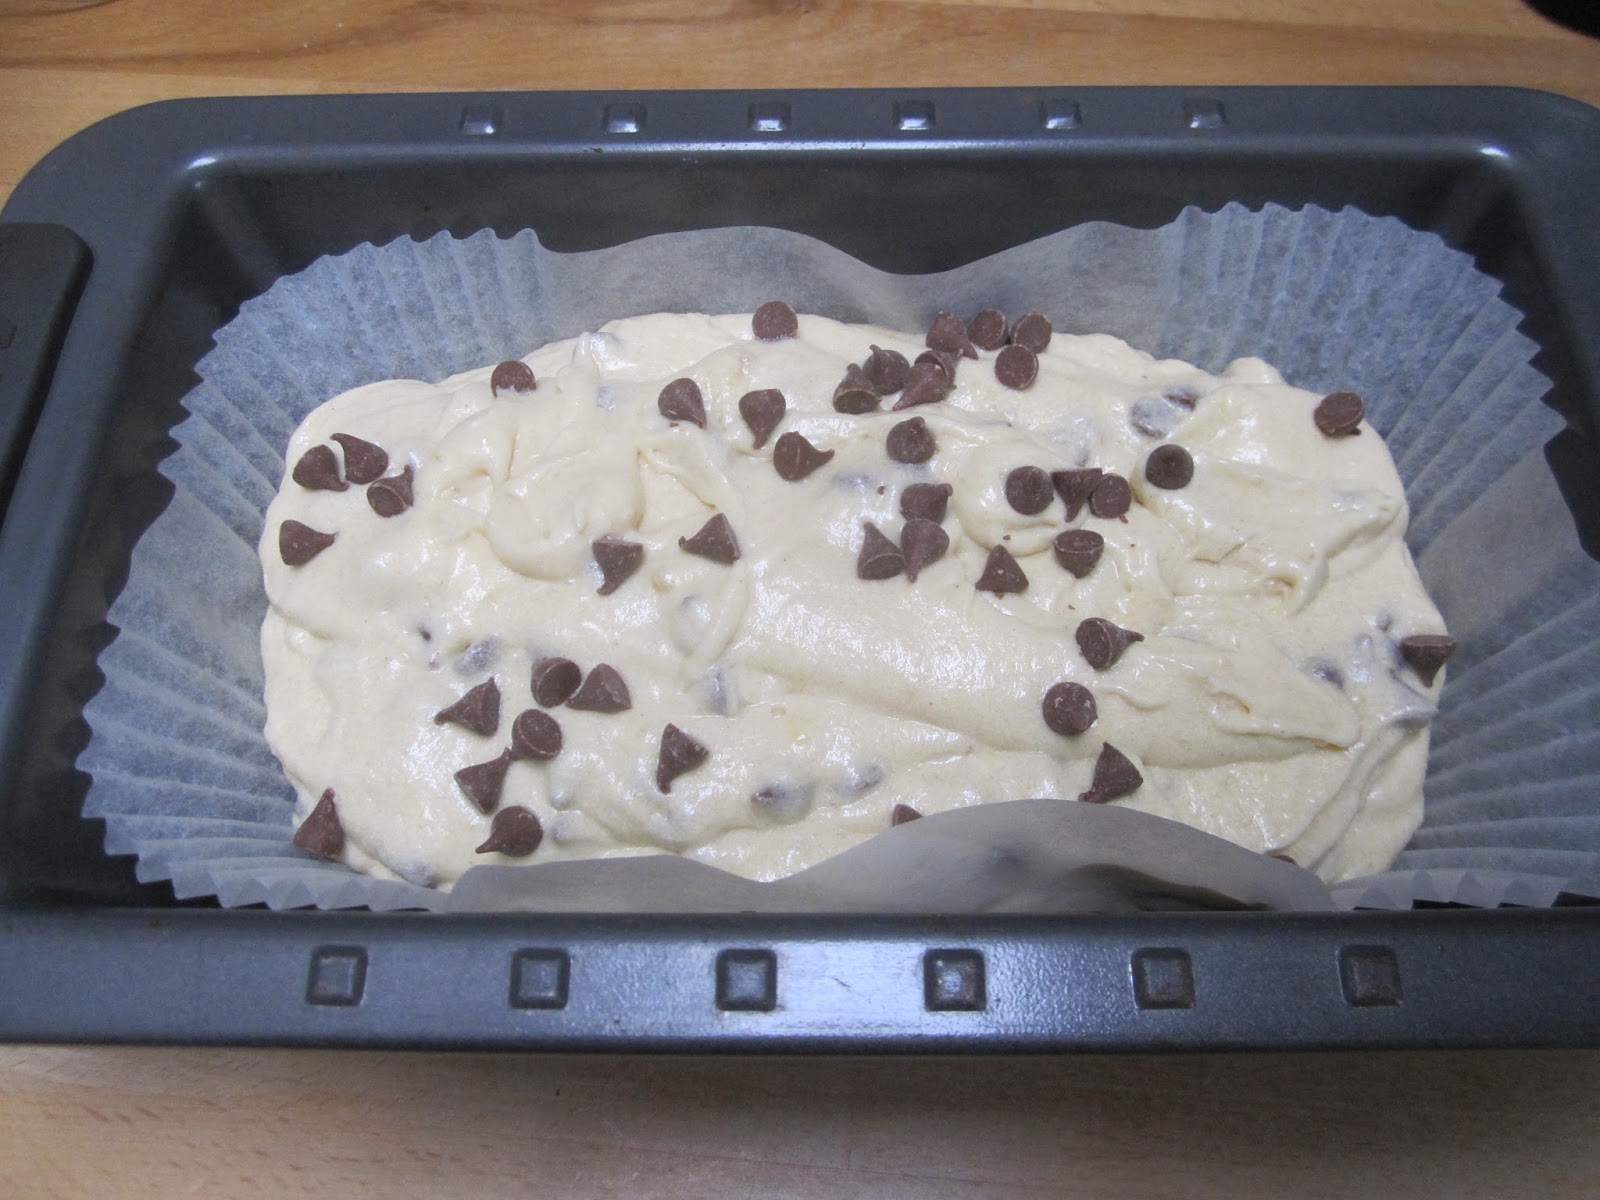
Sprinkle the chocolate chips into the mix - mixing evenly. Save a handful to sprinkle on the top too.


Add the mix to the prepared loaf dish and bake in the middle shelf of the oven for approx 50 mins to an hour.  Until nicely risen and golden brown. 
Enjoy! If you have a slice when it is warm from the oven, the chocolate chips will be nice and goey inside.

* Decorating tips: 

If you have any chocolate going spare in the house. Melt in a glass bowl over a small saucepan of boiling water and then drizzle over the top of the cake.
Alternatively, you can spread Nutella over the cake which is equally as delicious!