Tuesday, 22 December 2015

A classic 1974 Mrs Beeton Cherry and Sultana Loaf Cake


I found this recipe in a 1974 edition of a 'Mrs Beeton cookbook'. I often find the 'old school' recipes are fool proof and delicious. This is no exception and is a favourite in our house.

There is something so satisfying as a nice simple fruit loaf. Especially in the afternoon with a cup of tea. I'm personally a big fan of loaf cakes, as you don't have the 'guilt factor' associated with a triple layer buttercream filled cake.

One slice is perfect as a nice energy boosting pick me up and my children love it too!

Surprise surprise it is another 'all in one' minimal effort recipe. You can have it mixed up and ready to go in the oven in 10 mins. Then it needs no decorating once it is out of the oven. It can be eaten straight away. So a nice no fuss cake.

Ingredients:

4oz stork margarine
4oz caster sugar
2 large eggs beaten
6oz self raising flour
a little milk (approx 1 tbsp)
4 oz cherries (chopped how you like - 1/4 or 1/2)
3oz sultanas
Some demerara sugar to sprinkle on top

*You can use raisins instead of sultanas. Or substitute cherries for other dried fruit. It works well with dried cranberries and choc chips. Or add a mashed banana and choc chips. The substitutions are endless.

Method:

Pre heat your oven to 160 degrees C
Line your loaf tin

Find a large roomy mixing bowl.
Sieve the flour into the bowl, add the sugar, butter and beaten egg and mix well.
Add the milk and stir to give a fairly soft dropping consistency.
Stir in the fruit and mix so it is evenly distributed.
Put the mix into your prepared loaf tin and lightly sprinkle demerara sugar on top (this gives a nice crunch).
Bake in the oven for approx 45mins until nice and golden brown and well risen.
Leave to cool on wire rack, put the kettle on and tuck into the cake whilst it is still warm.

Enjoy x


Thursday, 3 December 2015

Yummy Blueberry Loaf Cake


I love blueberry muffins and so do my children, so what a better to please your family than making a blueberry loaf cake. It is like a giant blueberry muffin!

This is a nice simple all in one sponge recipe and also has a streusel topping, which gives it a nice crunchy texture, plus adds some sweetness against the tart blueberries.

I often make loaf cakes, as I think having a small slice of cake with a cup of the afternoon tea is a daily ritual. However, a loaf cake generates smaller slices than say a sandwich cake. So it is 'slightly' less guilt free. I just have to be disciplined to stick to the one slice ;-)

Here is the recipe, I promise it is nice and simple:

Ingredients:

Streusel topping: 

50g Plain flour
25g caster sugar
25g unsalted butter or margarine

Cake:

150g margarine
150g caster sugar (or use half caster sugar half light brown sugar for a richer colour)
200g self raising flour
2 free range eggs (beaten)
2 tbsp of whole milk
1/2 teaspoon of bicarbonate of soda
150g Blueberries - fresh or frozen are fine.

* if the streusel topping doesn't appeal. You can make make the cake as it is and dust with icing sugar afterwards. Or (tried and tested) you can make a water icing with icing sugar and lemon juice and drizzle on top. To make a lemon and blueberry loaf cake! 

Method:

Preheat your oven to 160 C (fan) and line your loaf tin.

Firstly make the streusel topping. Place the flour, butter and margarine in a bowl and rub together with your finger tips until they resemble breadcrumbs. Leave to one side.

Now, make the cake:

It is an easy peasy all in one recipe. 
Sieve the flour into the bowl along with the bi carb. Then add the sugar and margarine and beaten eggs and mix well. A wooden spoon is fine, or a electric hand whisk.
When nicely mixed add the milk followed by the blueberries mixing by hand slowly. You will notice the sponge will turn purple from the blueberries if you whisk too vigorously! 
Make sure the blueberries are evenly distributed. 

Place the mix into your prepared loaf tin. Sprinkle the streusel topping evenly over the top of the cake. 

Now bake in the oven for 45-50 mins. It will be nicely risen and golden brown on the top when it is ready. 

You can eat warm if you like. Try and make the cake last the rest of the day. It doesn't usually in our house! 


Sunday, 29 November 2015

Slow cooked Chicken Balti stew


This is a tasty and warming winter recipe. I make it most weeks, usually in the afternoon whilst my youngest sleeps, but then I put it in the slow cooker or on a low heat in the oven, so that the meat is tender and the flavours luscious!

It is a great meal if you have guests. It is a mild curry and also a cross between a curry and a stew. So even non curry fans will like it and it is hearty. My 1 year old even likes it!

If you have never made a curry before, this is a great one to start with. The first time I made it, I didn't have many of the ingredients, so had to spend a fortune on spices. But the spices are great store cupboard ingredients, so it works out more cost effective in the long run. Plus you will never buy a jar of curry sauce again. The base of this dish tastes so delicious and has a real depth of flavour and once you have made it once, every other time is so much easier.

The recipe is adaptable, you can add whatever meat or veg you fancy, but the idea is, you use the same base.

I make this curry in two stages. First make the base. You can make it advance if easier.
Then make the main part and add the base afterwards.

Ingredients:

To serve 2-4 people - this is a very generous serving for 2, but with added veg can easily feed 4.

Sauce/Base:

3 onions chopped
2 gloves of garlic
1-2 inches of chopped fresh ginger
1 red chilli chopped (if you like heat, add another!)
1 teaspoon cumin powder
1 teaspoon turmeric
1 teaspoon coriander powder
1 tbsp tomato puree
300ml chicken stock- a stock cube is fine. Use 250ml of this and keep the remaining 50ml for later if you need to add more liquid.

Method:

Heat some vegetable oil (or ghee if you have it) in a casserole dish or saucepan over a hob.
Add all the ingredients (apart from the tomato puree and stock) to the pan when hot. Stir and continue to cook until the onions are translucent and starting to brown.

Spoon the ingredients into a tall jug (see picture) and add the tomato puree and chicken stock.


Use a blender to create your sauce. It can be as smooth or chunky as you prefer.
Once blended, return the to the casserole dish and bring to the boil, then simmer. This will thicken the sauce slightly. Put the sauce to one side.

Curry:

600g boneless chicken thighs chopped(you can use chicken breast if you prefer) 
2 large onions. Chopped
1 red chilli chopped (optional)
1 tsp cumin powder
1 tsp turmeric
1/2 tsp cinnamon powder
1 tsp paprika
1 tsp garam masala
1 tbsp tomatoe puree

Ideas of veg to add:

1 red pepper chopped into large chunks
Bag of spinach (my favourite veg to add!) Literally stir it in. It wilts nicely
Aubergine chopped
Sweet potato
chick peas are also a great addition

You really could add whatever you like, the base is so tasty in itself that you can choose your veg based on what you have in the fridge, or whatever your personal preference is. 

Method:

Heat vegetable oil in the same casserole dish you used to make the sauce. Or in your slow cooker (if you can use it on a hob)

When the oil is hot add the chicken pieces and fry gently adding salt and pepper, turning over ensuring nice and brown.


When browned, but not necessarily cooked through. Remove the chicken and set aside. (It will cook through later)

Add the onion, chilli, cumin powder and turmeric and fry in the juices until nicely browned.

*If adding vegetables add to the onion now and gently simmer, stirring to ensure the vegetables getting nicely browned.

Return the chicken pieces to the dish, along with your curry sauce made earlier.

Add the cinnamon/paprika and garam masala and give a good stir.

Lastly add the tomato puree, give one last stir and bring the dish to the boil.

* If you are not slow cooking, cover the dish and let simmer on the hob for approx 20 mins and sprinkle with fresh coriander and serve.

* If slow cooking. Cover the dish and place in a low oven on 140 C fan for 3-4 hours. Or transfer the curry to your slow cooker, if you do not have one you can use on your hob. 
The meat will be deliciously tender and the flavours absolutely lovely.

Make sure you serve with fresh coriander. It makes all the difference!

Serve with basmati rice and enjoy.


Tuesday, 17 November 2015

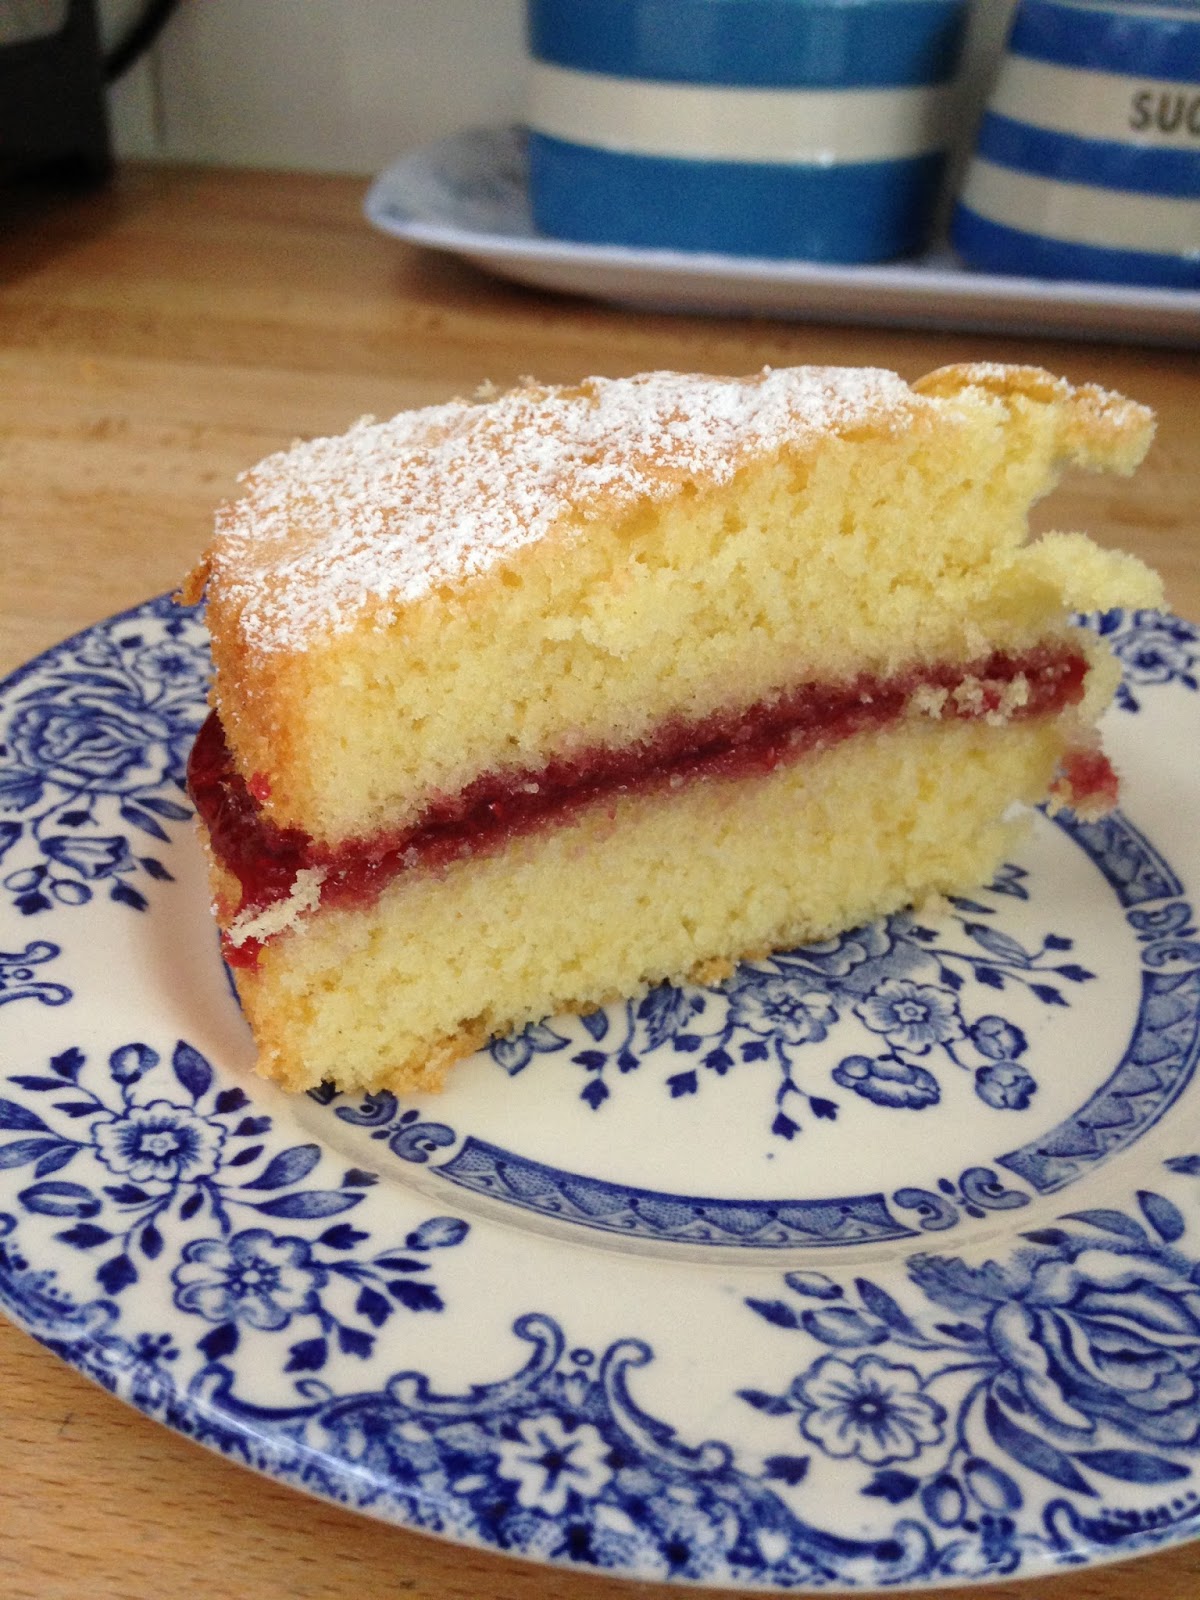
A Classic 'Victoria Jam Sandwich' Cake


Lot of my friends have asked for me to put this recipe on the blog.
This is 'the recipe' to try if you have never baked a cake before. It requires no artistic flair or decoration. So, if you are reading this and have never baked before, I really encourage you to give it a go.

Just follow the simple instructions, remember not to open the oven half way through and then it will be perfect! It can't really go wrong.

This is the ultimate cake to make when you have guests due, but no time. I can guarantee it will be on the table ready to serve in 30 mins. You only need a few mins to get it in the oven, then it cooks in 20 mins.

You can put the jam on the cake straight from the oven and eat it warm. It doesn't need to cool first. You don't need to make any toppings/icing. Just spread jam from a jar.

Plus, have you ever met anyone that doesn't enjoy a classic Victoria Jam Sandwich cake?

Traditionally, when making a Victoria sponge, you should (according to Delia) cream the butter with the sugar, then slowly add the beaten eggs, followed by the flour and this is how I was taught.

However, as I often make this cake in a hurry, I tend to use the 'all in method' which is as a 'bung everything in the bowl and mix together method' and I can't tell the difference. You just need to add 1/2 teaspoon of baking powder to the mix and the rise/texture and taste will be exactly the same.

Ingredients:

6 oz (175g) self raising flour
6 oz (175g) stork margarine or softened unsalted butter
6 oz (175g) caster sugar
3 free range eggs
1/2 teaspoon baking powder
Good quality raspberry or strawberry jam
Icing sugar - to dust

Method:

Pre heat your oven to 160 degrees (fan)
Line the bottoms of two sandwich tins using greaseproof paper. 


Weigh out the ingredients and crack the eggs into a large roomy mixing bowl.
Mix everything together well with a wooden spoon or electric hand whisk.
Divide the mix into the two sandwich tins and use a palette knife to smooth over the mix so it is evenly distributed.
Place in the oven and set timer for 20 mins. If your oven is not fan you may need 22 mins approx.

Once baked take out of the oven and turn cakes onto a wire cooling rack.

Either leave to cool, or if like me, you have baked the cake in a hurry whilst constantly checking the clock like you are on the 'Great British Bake Off' and have guests about to knock on the door any second, spread the jam generously onto one of the sandwich halves and sandwich together whilst the sponge is warm.

Put on a pretty plate or cake stand and dust with icing sugar.

Serve to your guests with a cup of tea and enjoy all the compliments you get. 
"Oh this cake is delicious" "you shouldn't have gone to any trouble" and "ooh it's so light" 
Just avoid the "Did you make your own jam?" question. Unless you did make your own jam and then I salute you! 


Wednesday, 4 November 2015

My Facebook Page

Hello!

If you have been following my blog posts, please check out my Facebook page:

https://www.facebook.com/minimumeffortmaximumoutput/?ref=aymt_homepage_panel

I post all my new recipes on this page, plus also share other recipes that I find myself on other blogs or on twitter.

I have always enjoyed experimenting in the kitchen. But before I was on twitter I had my old favourite recipes and rarely tried making anything too exotic.

I find so much inspiration from food bloggers and tweeters! So now I have a much wider repertorie in the kitchen and have so much more confidence to try new things.

I try and post recipes on my Facebook page most days. So check it out.

I do promise, everything will be minimum effort, maximum output. As I know no other way of doing anything! ;-)

Thank you

Katie x


Chocolate Orange Loaf Cake


This is a deliciously simple but rich and moist chocolate cake.

I saw the recipe on another food blog (http://www.josblueaga.com) for the loaf cake itself last week. It looked such a rich chocolatey colour, plus the sponge recipe is similar to that of a brownie. So I guessed it would be more dense and goody than a usual chocolate cake. So couldn't wait to have a go at making it.
Just because I can never quite leave a recipe as it is, I added my twist which was the Chocolate Orange topping. It went down very well!

This recipe is so adaptable I will certainly be trying it out with other flavours. I think it would work well with a chocolate ganache topping and some roasted nuts.
Alternatively you could add raspberries as I think chocolate and raspberries go beautifully together.
Or make it more of a triple chocolate cake, buy adding white chocolate chunks to the mix and topping with melted milk chocolate with white chocolate shavings or buttons. Yummy! 

If those flavours appeal to you, give this a try. 

Ingredients:

125g softened butter or stork
125g soft light brown sugar
100ml full fat milk
50g cocoa powder
150g self raising flour
1/2 tsp bicarb
3 eggs
100g dark chocolate (broken into pieces)
Zest of 1 orange

To decorate:
100g of milk chocolate.(I used dairy milk)
1 Terrys Chocolate Orange. (you can use as much or as little as you like. There will definitely be some left over for nibbling!)

Method:

Line your loaf tin. Or use a loaf tin liner 
Preheat the oven to 160 degree C (fan) gas mark 3

Start by placing the milk, butter, sugar and cocoa powder into a large pan stir and heat until the butter and sugar have melted and the mix is well combined, now stir in the chocolate chunks (they don't need to melt completely. Leave to one side for at least 10 mins to cool. 

Weigh the flour and bicarb into a bowl.
In a separate bowl or jug, whisk the eggs with a fork and set aside.
Once the chocolate mixture has cooled, pour the chocolate liquid into the flour along with the eggs, mix together until smooth and lump free. 
Add the zest of the orange and mix.

Pour the mix into the prepared tin and bake in the oven for 25 mins or until a skewer comes away clean when inserted into the centre. 
Please be aware that the cake may not quite look cooked, but the idea is that it should still be gooey, like a brownie. If you have a good rise after 25 mins it will be ready.

Leave to cool in tin.


Once the cake has cooled, melt the chocolate by placing in a glass bowl above a saucepan of boiling water. Drizzle the chocolate over the cake generously and top with chocolate orange slices.

Enjoy! 

p.s there is less guilt with a loaf cake as the slices are generally smaller! 


Wednesday, 28 October 2015

Oven baked Spanish style chicken thighs


This recipe is extremely easy. Requires very little effort and cooks itself. What more do you want?
Chicken thighs are very tasty and also inexpensive. I buy them on the bone with the skin on. I find the meat is juicy and tender and far more tasty than the breast meat.
This is a really inexpensive way of feeding a whole family, or creating a main course when you have people over.

I often cook it on a week night when I have things in the fridge to use up. The chicken thighs will crisp up in the oven and release juices. So regardless of what other ingredients you use, it will be super tasty. In the past I have used onions, mushrooms, peppers, herbs, garlic, chilli, potatoes, parsnips, ham, bacon lardons, chorizo/salami.... You can also throw in some veg for the last minute of cooking. Green beans or spinach works particularly well.
The idea is to buy the chicken, but then throw in whatever else you have in your fridge. Not buy the ingredients especially.

When I made it this week I had one red onion left, a handful of cherry tomatoes that were going a bit soft, a 1/3 of a big ring of chorizo sausage going out of date. Plus half a lemon that had seen better days. Those flavours go perfectly well with chicken. Chorizo especially is great, as the paprika, chilli and garlic in the sausage flavours come out when cooked to add colour and flavour to the dish.

This is the recipe:

To serve 2 people:

1 pack of 6 British chicken thighs (on the bone and skin on) approx 500g.
1 red onion (a white onion would be just as good)
Handful of cherry tomatoes
Fresh Parsley
Spicy Chorizo sausage - enough to cut into about 10-15 slices/chunks.
* I tend to buy these in rings. They are great as often cost £2-3 but you only need a little at a time and as they are cured meat, they stay in date for a while, so you get lots of use out of them.
A splash and olive oil
Salt and pepper

Method:

Preheat your oven to 180C (fan)

Find a decent size oven proof dish. Put a dash of olive oil in and place the chicken evenly in the dish.

Chop your onions and chorizo roughly and disperse evenly in the dish.

Cut the lemon into 1/8 pieces and place in between the chicken pieces.

Throw the cherry tomatoes in.  *You can add them for the last 10 mins of cooking if you prefer them not to burst.

Sprinkle with chopped parsley (save some to so you can sprinkle on again at the end) and season well with salt and pepper.


Place in the oven to cook for approx 35-40 mins. The chicken should be cooked through, with nice crispy skin.

*Check on the chicken 2 or 3 times turning the chorizo pieces and onion to make sure not too brown around edges.

When cooked sprinkle once more with parsley and a little more black pepper.

Serve with green veg or a salad and some potatoes if you fancy.
*They go great any variety of potatoes as there is loads of juice and flavour from the chicken. So skin on wedges, sauteed potatoes, new potatoes (boiled or roasted) or even mash works well.

Enjoy!